Free shipping on orders over $99.00 USD


How to Replace Suitcase Parts
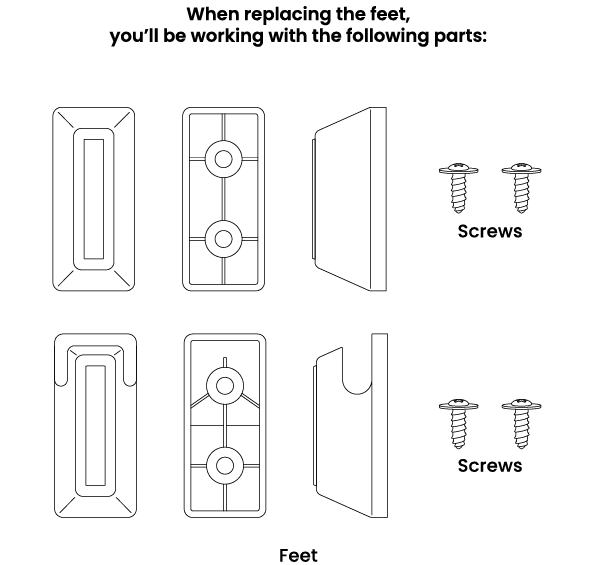
How to Replace the Feet
Replacing the feet on your carry-on suitcase is a simple process that only requires a screwdriver. We recommend using a crosshead screwdriver or a power drill.
Before you begin, take a moment to read through these instructions to ensure a smooth replacement.
Tools Required:
- Crosshead screwdriver or power drill
Step-by-Step Instructions:
-
Prepare Your Suitcase
Place your suitcase flat on a stable surface. This will give you easy access to the side of the suitcase, where the feet are located.
-
Access the Interior of the Suitcase
Remove the compression pad (if any), then unzip the lining inside the suitcase to expose the area where the feet are connected to the shell.
-
Remove the Old Feet
Locate the screws that secure the foot to the suitcase. Using your screwdriver or power drill, carefully remove the screws. Once the screws are removed, gently pull the old foot away from the shell.
-
Install the New Feet
Take the new foot and hold it in place on the exterior of the suitcase. Line up the back plate of the foot with the screw holes inside the suitcase.
-
Secure the New Feet
Insert the screws into the screw holes and hand-tighten them using your screwdriver or power drill. Ensure that the foot is securely attached and does not wobble.
-
Close Up the Suitcase
Once the new foot is securely in place, zip up the interior lining to close the suitcase. Ensure that everything is neatly aligned and secure.

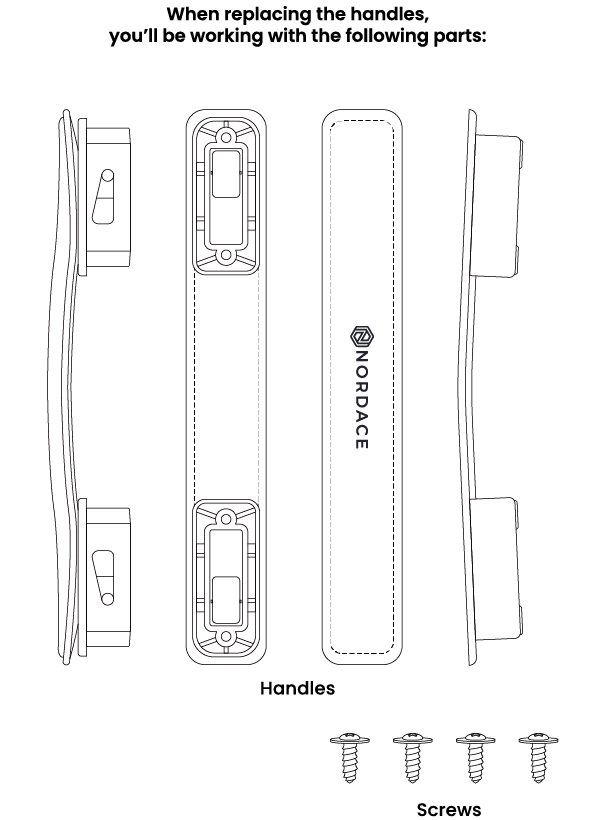
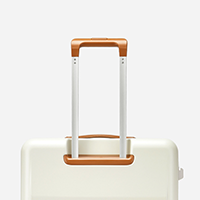
How to Replace the Handles
Replacing the handle on your suitcase is a straightforward task that requires just a few simple steps. All you need is a screwdriver – we recommend using a crosshead screwdriver or a power drill.
Before you start, take a moment to read through these instructions to ensure everything goes smoothly.
Tools Required:
- Crosshead screwdriver or power drill
Step-by-Step Instructions:
-
Prepare Your Suitcase
Place your suitcase flat on a stable surface. This will give you easy access to the interior lining and the handle you want to replace.
-
Access the Handle Screws
Unzip the interior lining of your suitcase to expose the screws that secure the handle.
-
Remove the Old Handle
Once the four screws that secure the handle are removed, gently pull the damaged handle away from the exterior of the suitcase. The handle has two parts: the interior and exterior pieces. Carefully separate these parts as you remove the old handle from the suitcase.
-
Install the New Handle
Position the new handle by aligning both the interior and exterior parts in their respective places, ensuring they align with the screw holes.
-
Secure the New Handle
Insert the screws one by one, tightening them securely using your screwdriver or power drill.
-
Check the New Handle
Lift and lower the handle a few times to ensure both parts move as intended and remain securely connected.
-
Close the Suitcase
Once the new handle is securely in place, zip up the interior lining to close the suitcase. Ensure everything is neatly aligned and secure.

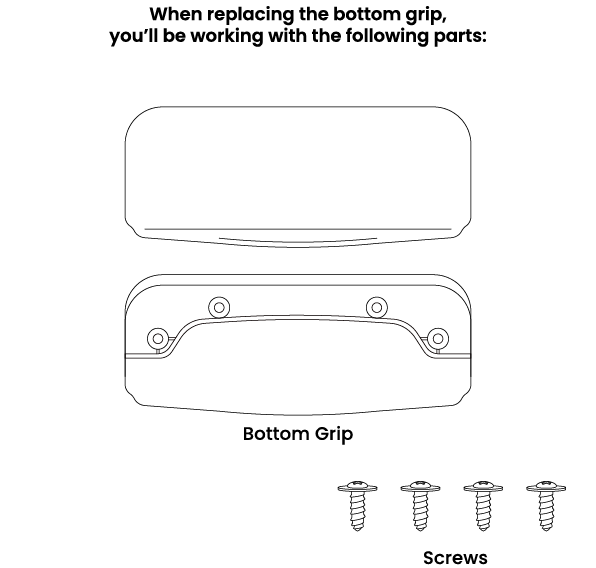
How to Replace the Bottom Grip
Replacing the bottom grip on your suitcase is a simple process that can be done with just one tool – a screwdriver. We recommend using a crosshead screwdriver or a power drill.
Before starting, take a moment to read through the instructions to familiarize yourself with the steps.
Tools Required:
- Crosshead screwdriver or power drill
Step-by-Step Instructions:
-
Open the Zipper Inside the Suitcase
Look inside your suitcase and unzip the lining to access the area where the bottom grip is attached.
-
Locate the Screws
Find the screws that hold the bottom grip in place.
-
Remove the Old Bottom Grip
Use a screwdriver to take out the screws holding the old grip. Set the screws aside in a safe place.
-
Put the New Grip in Place
Take the new grip and line it up with the holes where the screws go.
-
Screw in the New Grip
Tighten the screws to secure the new grip. Make sure it’s firmly attached.
-
Close the Lining Zipper
Zip up the interior lining to close the suitcase.
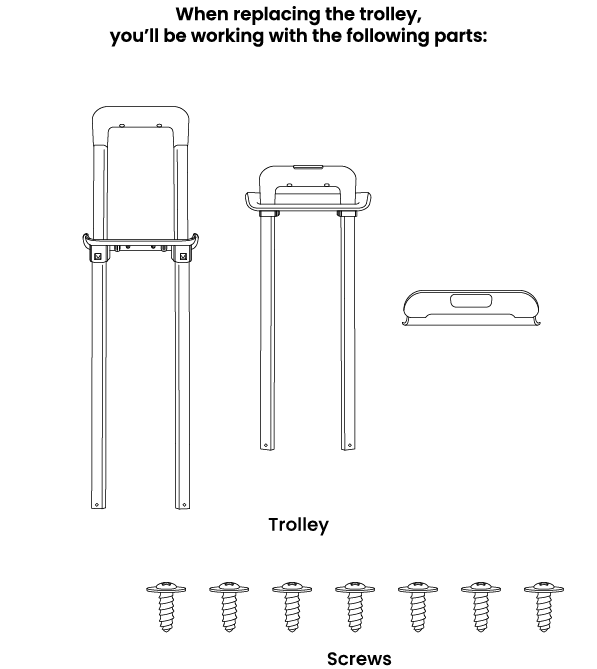
How to Replace the Trolley
Replacing the trolley (the handle and poles) on your suitcase is a straightforward task that requires just one tool – a screwdriver. We recommend using a crosshead screwdriver or a power drill.
Before you start, take a few moments to read the instructions.
Tools Required:
- Crosshead screwdriver or power drill
Before Replacing the Trolley:
- Inspect the telescopic handle for any visible damage and ensure the locking mechanism works.
- Check if all screws are in place.
- Remove any debris stuck in the tube using a thick stick or wire.
- Apply a grease-based lubricant to the rods to smooth the operation.
- If the telescopic handle remains faulty, consider replacing the trolley entirely.
Step-by-Step Instructions:
-
Prepare Your Workspace
Place your suitcase flat on a stable surface.
-
Access the Inner Trolley
Unzip the lining inside your suitcase to expose the inner components. You should now be able to see the trolley system, which consists of the metal poles and the handle.
-
Locate and Remove the Screws
- The trolley is secured by six screws: four at the top near the handle and two at the base of the poles. The top screws are located between the poles, while the base screws are at the bottom of the suitcase.
- Start by unscrewing the two screws at the base of the poles.
- Next, unscrew the four screws at the top. Be careful not to remove any other screws attached to the shell beneath the top handle.
-
Remove the Old Trolley
With all screws removed, the trolley should be free from the suitcase. Carefully pull the metal trolley poles out of the plastic brace at the bottom. Then, pull the trolley out by the exterior handle.
-
Install the New Trolley
Take your new trolley and slide the metal poles through the opening at the top, ensuring they pass through the inner trolley reinforcement inside the suitcase.
-
Secure the Trolley Poles
Fit the base of the poles into the brace at the bottom of the suitcase. Ensure everything is aligned properly.
-
Reattach the Screws
Align the screw holes at both the top and the base of the poles. Carefully insert the correct screws into their respective positions:
- Use the screws you set aside for the top to secure the trolley to the inner reinforcement.
- Use the screws you set aside for the base to secure the poles to the brace.
- Tighten each screw until it is secure and cannot twist any further.
-
Close the Suitcase
Once the trolley is securely in place, zip up the interior lining to close the suitcase. Ensure that the trolley handle extends and retracts smoothly.
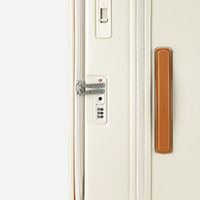
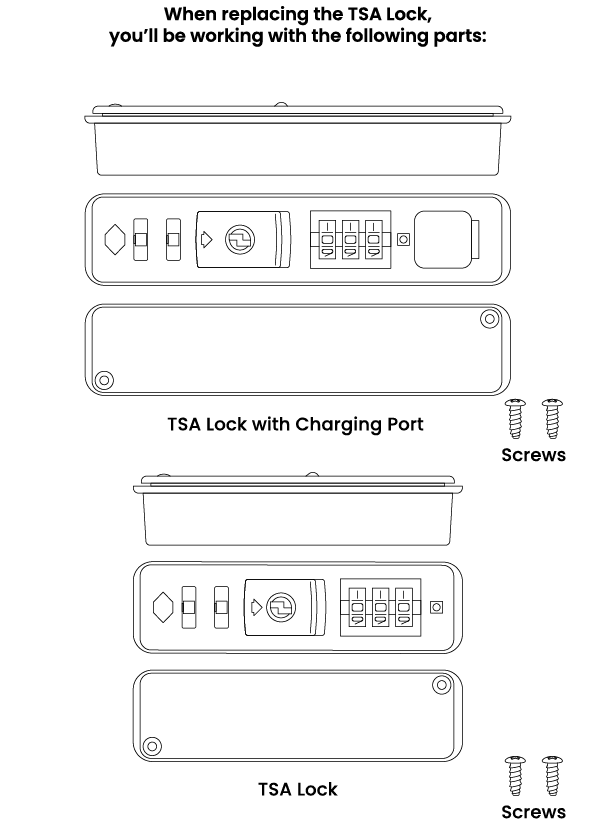
How to Replace the TSA Lock
Replacing the TSA lock on your suitcase is a quick and easy process that requires just one tool – a screwdriver. We recommend using a crosshead screwdriver or a power drill.
Before you begin, take a moment to read through these instructions.
Tools Required:
- Crosshead screwdriver or power drill
Step-by-Step Instructions:
-
Prepare Your Suitcase
Place your suitcase flat on a stable surface. This will allow you easy access to the lock mechanism.
-
Access the TSA Lock
Unzip the interior lining of your suitcase to expose the screws holding the TSA lock in place.
-
Remove the Old Lock
- Locate the two screws securing the lock casing.
- Using your screwdriver or power drill, carefully unscrew the screws and set them aside.
- Once the screws are removed, gently lift off the casing.
- Push the old TSA lock from the interior outward, allowing it to pop out of the shell.
-
Install the New TSA Lock
Take your new TSA lock and insert it into the slot where the old lock was removed.
-
Secure the New Lock
- Place the casing over the new lock, ensuring that the screw holes align with the top right and bottom left corners of the lock casing.
- Insert the screws you set aside earlier into the screw holes and tighten them securely using your screwdriver or power drill.
-
Finish Up
- Once the lock is securely attached, zip up the interior lining to close the suitcase.
- Double-check that the lock is firmly in place and operates smoothly.
-
Set Your New Code
Now that your new TSA lock is installed, set your preferred combination.
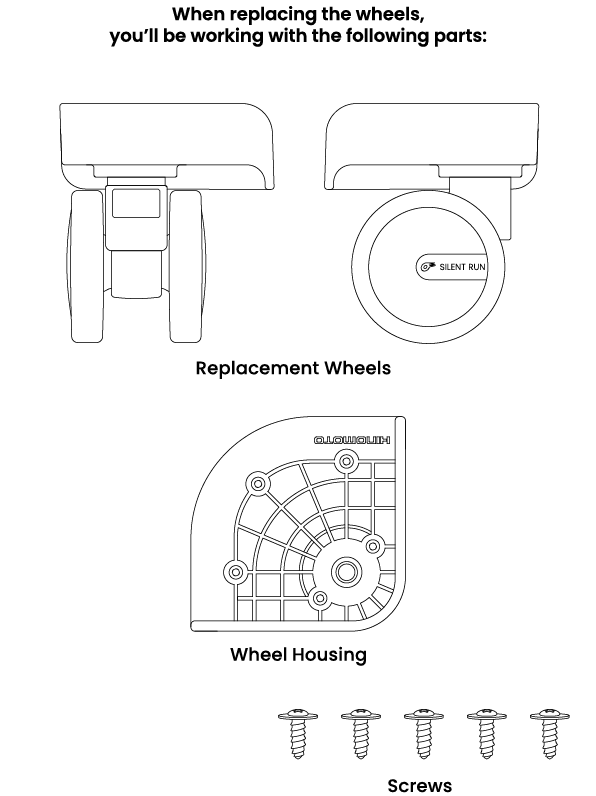
How to Replace the Wheels
Replacing the wheels on your suitcase is a simple process that can be done with just one tool – a screwdriver. We recommend using a crosshead screwdriver or a power drill.
Before you begin, take a moment to read through the instructions to ensure you’re familiar with the steps.
Tools Required:
- Crosshead screwdriver or power drill
Step-by-Step Instructions:
-
Clean the Wheels
Before starting the repair process, carefully clean the wheels with a damp cloth. Check for any dirt, debris, or small objects lodged in the wheel that could be restricting its movement. A clean wheel ensures smoother operation and allows for easier repair or replacement.
-
Prepare Your Suitcase
Place your suitcase flat on a stable surface. Unzip the interior lining to expose the screws that secure the wheels to the suitcase frame.
-
Remove the Damaged Wheel
Locate the screws that hold the damaged wheel in place. Using your screwdriver or power drill, remove all the screws carefully. Once all screws are removed, gently pull the damaged wheel away from the suitcase.
-
Install the New Wheel
Take your new wheel and slide it into the position where the old wheel was. Ensure that the wheel is properly aligned with the screw holes on the suitcase.
-
Secure the New Wheel
Line up the screws with the holes in the new wheel. Insert the screws into the holes and use your screwdriver or power drill to tighten them. Make sure the screws are securely fastened and cannot twist any further. Test the wheels by rolling the suitcase around to confirm they’re secure and working smoothly.
-
Finish Up
After securing the new wheel, zip up the interior lining to close the suitcase. Ensure that the wheel is firmly in place and spins freely.

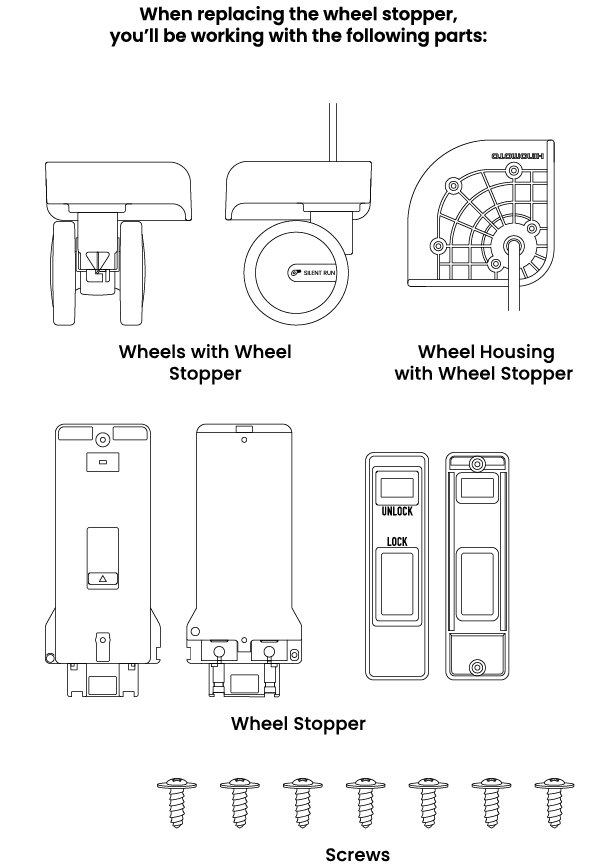
How to Replace the Wheel Stopper
Replacing the wheel stopper on your suitcase is a simple process that can be done with just one tool – a screwdriver. We recommend using a crosshead screwdriver or a power drill.
Before you begin, take a moment to read through the instructions to ensure you’re familiar with the steps.
Tools Required:
- Crosshead screwdriver or a power drill
Step-by-Step Instructions:
-
Prepare Your Suitcase
- Place your suitcase flat on a stable surface.
- Unzip the interior lining to access the screws holding the wheel stopper components.
-
Remove the Old Wheel Stopping Mechanism
- Find the screws holding the wheel stopper cable on the wheel lock switch (side of the suitcase). Use a screwdriver or power drill to remove them and keep the screws safe.
- Gently pull out the wheel stopper cable.
- Next, locate and unscrew the screws securing the wheel to the suitcase. Carefully remove the wheel.
-
Inspect the Wheel
Check the area where the wheel stopper was installed to ensure there are no cracks or debris that could affect the new component. Clean the area if needed.
-
Install the New Wheel Stopping Mechanism
- Pass the new wheel stopper cable through the hole in the wheel housing.
- Position the new wheel stopper and secure it with screws.
- Attach the cable to the wheel lock switch and tighten its screws.
-
Test It Out
Engage and release the wheel stopper a few times to ensure it works smoothly.
*Nordace cannot be held responsible for any potential harm or damage that may arise from using this repair kit or the related tools. Please take care while following the steps. If you need help at any point, feel free to reach out to us at [email protected], and we’ll be more than happy to assist you throughout the repair process.
